
How to Track Business Expenses and Income on iPhone
Most freelancers start the year with good intentions. A fresh spreadsheet in January, a shoebox for receipts, maybe an accounting app trial. By March, the spreadsheet has 40 rows and a three-week backlog. By Month 3, the system is abandoned, and tax season becomes a scramble through Gmail and Apple Pay history.
The problem is not willpower. It is friction. Every time logging an expense requires opening a laptop and typing dates, amounts, and categories, the system loses. This guide walks through how to keep track of business expenses and income using the device you already pull out at checkout: your iPhone. We cover Shortcuts, receipt capture, mileage, and a free spreadsheet fallback for low-volume tracking. For a broader overview, see our complete guide to tracking expenses.
This post is not tax advice. Talk to a CPA about your situation before filing Schedule C.
What counts as a business expense vs personal
The IRS allows you to deduct any expense that is "ordinary and necessary" for your trade. Ordinary means common in your field. Necessary means helpful and appropriate. A web designer can deduct Figma. A plumber can deduct a pipe wrench.
Common Schedule C categories for self-employed filers:
- Advertising (Line 8): hosting, domain fees, Google Ads, business cards.
- Car and truck (Line 9): mileage at 72.5 cents per mile in 2026, or actual costs.
- Contract labor (Line 11): payments to 1099 subcontractors.
- Insurance (Line 15): business liability, not health insurance.
- Office expense (Line 18): paper, pens, printer ink.
- Rent (Line 20b): coworking, storage, office space.
- Supplies (Line 22): consumables used within the year.
- Travel (Line 24a): flights, hotels, rideshares for out-of-town work.
- Meals (Line 24b): 50% deductible in 2026.
- Utilities (Line 25): business phone line, business internet.
- Home office (Line 30): simplified method is $5 per square foot up to 300 sq ft.
Personal expenses like groceries or a gym membership do not qualify. Mixed-use items like one phone for both uses require allocating a business percentage. For more on the income side, see our explainer on W-2 vs 1099 income.
Spreadsheet vs app: which actually works
A spreadsheet works fine if you have fewer than five business transactions per week and the discipline to log them within 24 hours. Above that threshold, the spreadsheet quietly rots.
| Factor | Spreadsheet | iPhone app |
|---|---|---|
| Cost | Free | $0 to $20/mo |
| Point-of-sale logging | Awkward | Instant |
| Receipt attachment | Manual | Auto-linked |
| Categorization | Manual | Suggested |
| Tax export | Manual pivot tables | One tap to CSV |
| Best for | Under 5 txn/week | 5+ txn/week |
Spreadsheets win on transparency and ownership. No vendor lock-in. Apps win on point-of-sale capture: the moment you tap your card is the moment you remember why the expense happened. A spreadsheet cannot capture that. For most freelancers past the starter stage, the app wins because the spreadsheet system fails silently.
A middle path works too: use the iPhone for capture and export to a spreadsheet monthly for review.
How to track business expenses and income on iPhone
The goal is simple: log every business transaction within 24 hours, categorize it correctly, keep a receipt, and review the totals once a month. Here is a seven-step system that runs entirely from your pocket.
Step 1: Set up a dedicated categories list mapped to Schedule C
Build your category list once so you never have to think about it at the register. Use these categories in your app or spreadsheet:
- Advertising
- Car and mileage
- Contract labor
- Insurance (business)
- Meals (50%)
- Office supplies
- Rent or coworking
- Software and subscriptions
- Travel
- Utilities (business share)
- Home office
- Other (review monthly)
Add an "Income" parent category with subcategories for each client. This one-time setup saves hours at tax time because every entry already maps to a Schedule C line. In a spreadsheet, make them a dropdown via data validation.
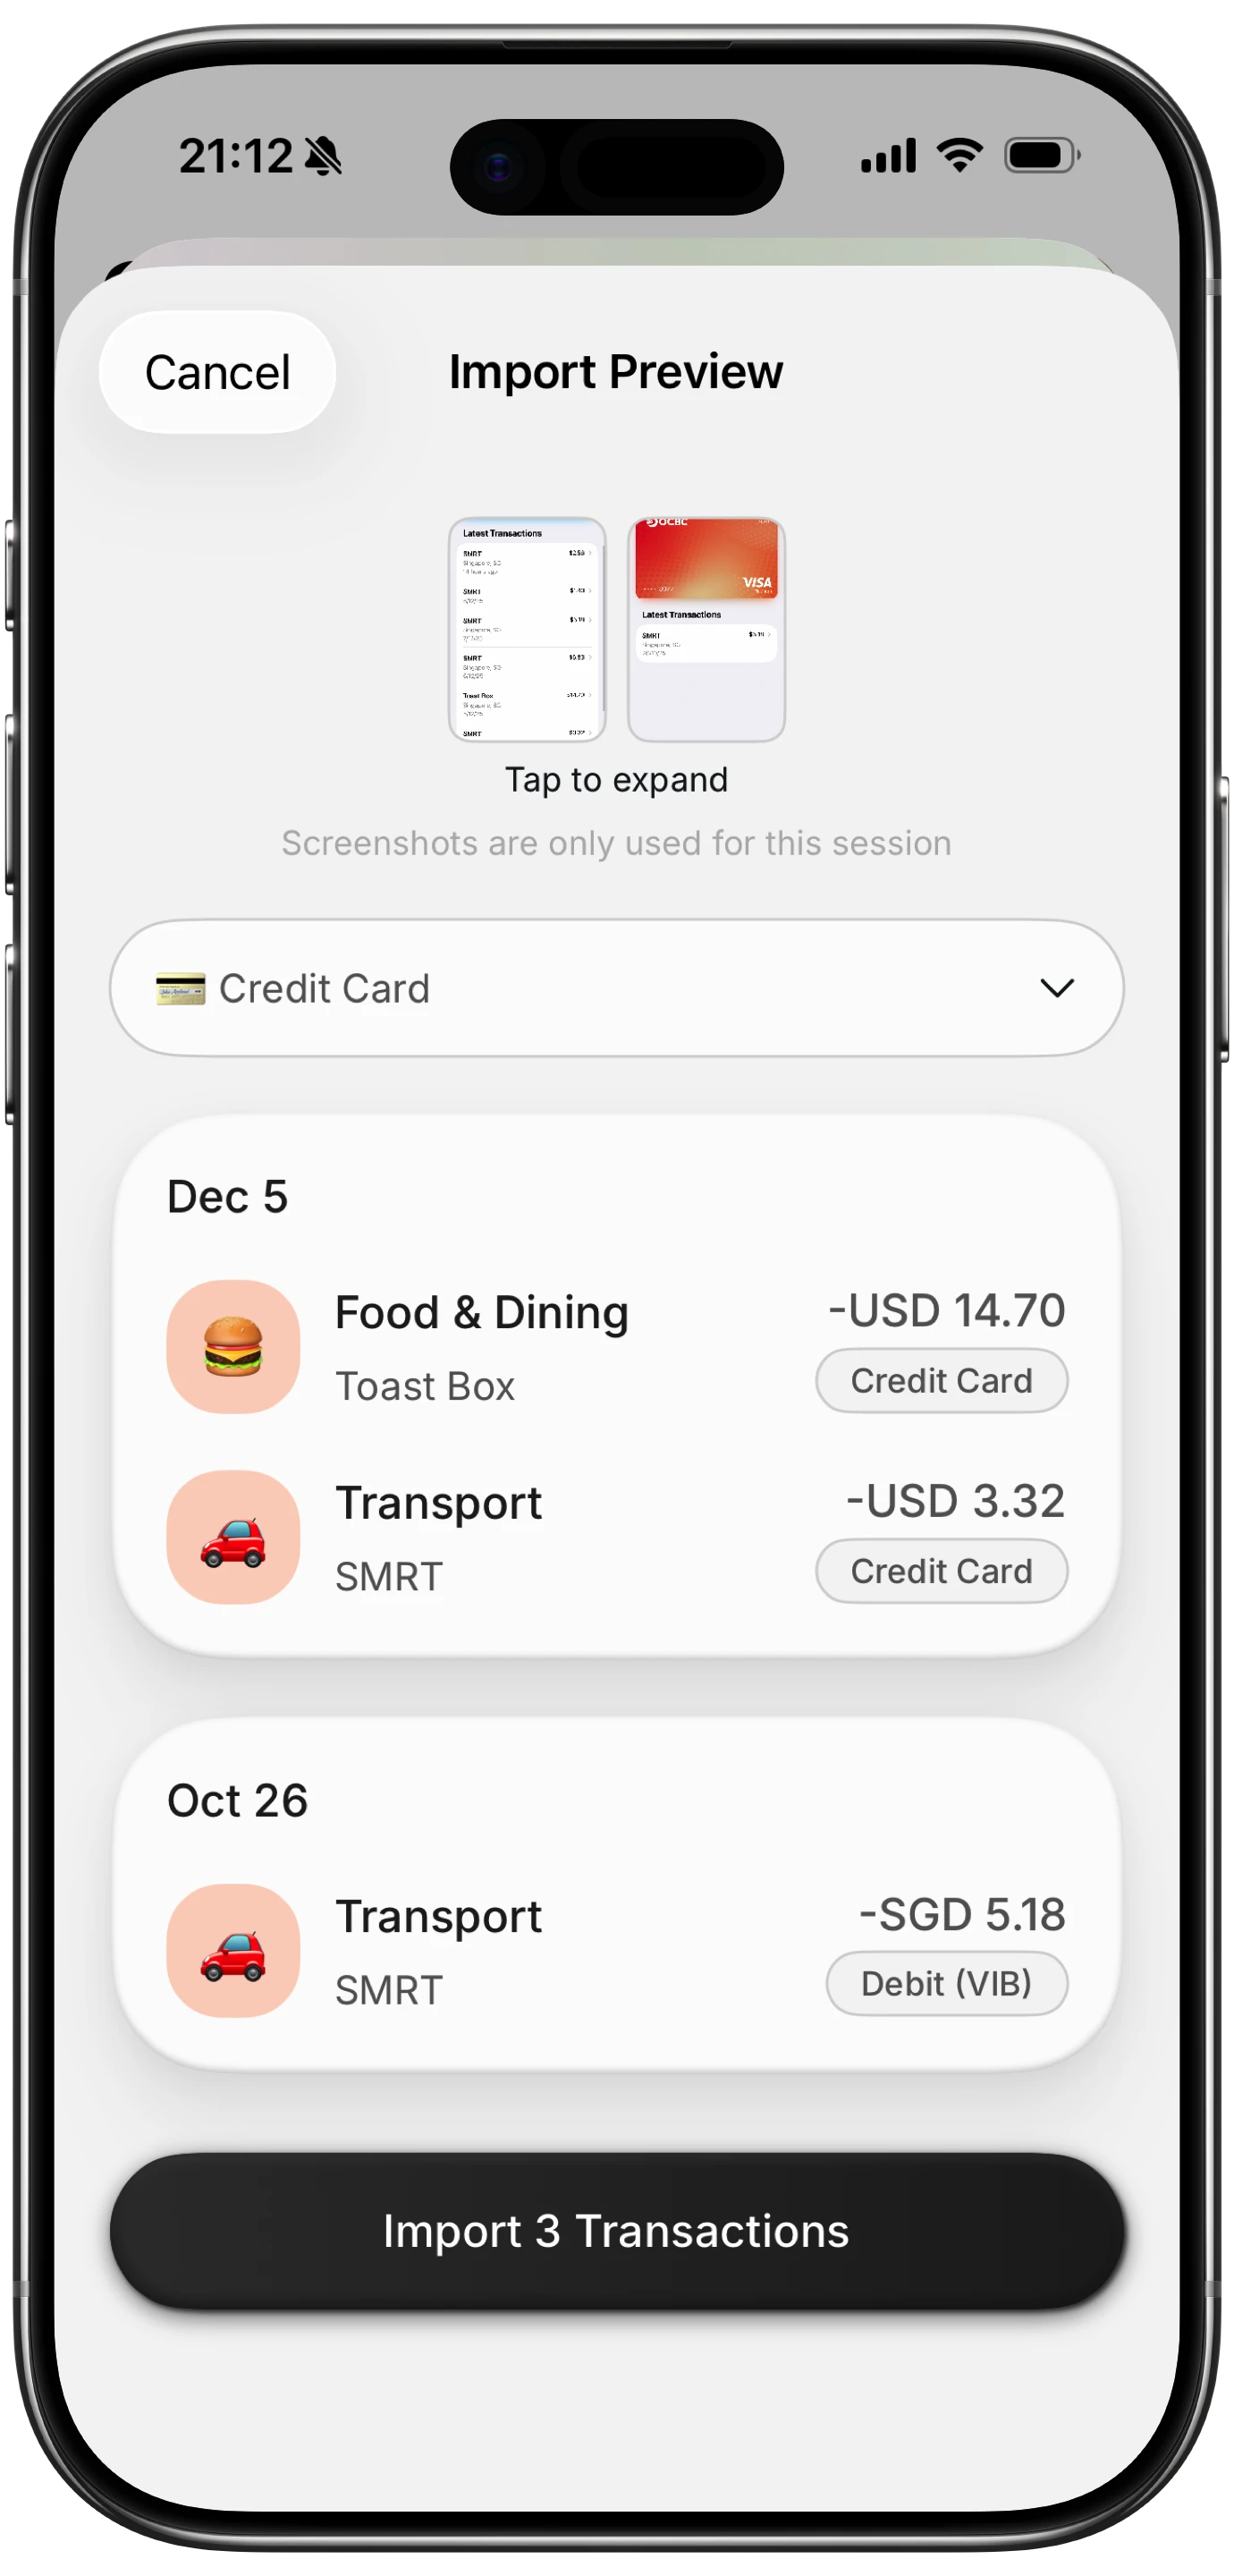
Step 2: Capture receipts at point-of-sale using the Share Extension
The biggest reason expense tracking fails is receipt loss. Fix it at the source.
- For paper receipts, open Notes or Camera and scan. Notes has a built-in document scanner under the camera icon.
- For email receipts (Amazon, Uber, Stripe fees), open the email and tap Share.
- Use the Share Extension to send the image or PDF directly to your tracking app.
Apps with a Share Extension accept receipts from any iOS app without manual upload. OCR reads the merchant, date, and amount. Total time per receipt: under 10 seconds. For a deeper dive on scanner quality, see our best receipt scanner apps guide.
Step 3: Use Apple Shortcuts to log recurring expenses with one tap
Apple Shortcuts is underused by freelancers. You can build a Shortcut that logs a recurring expense (coworking coffee, a Zoom subscription, a monthly software charge) with one tap from the Home Screen, Lock Screen, or Action Button on iPhone 15 Pro and later.
Basic recipe:
- Open Shortcuts and tap the plus button.
- Add an action that opens your expense app with pre-filled parameters via URL schemes or App Intents.
- Pre-fill the merchant, amount, and category.
- Add the Shortcut to your Home Screen and name it "Log coffee."
- Optional: pair with an NFC tag at your desk so tapping your phone triggers the Shortcut.
The Tap to Track pattern pairs an NFC tag with Apple Pay: tap to pay, tap on the NFC tag, and the expense is logged. For the full walkthrough, see our Apple Pay expense tracking Shortcut guide.
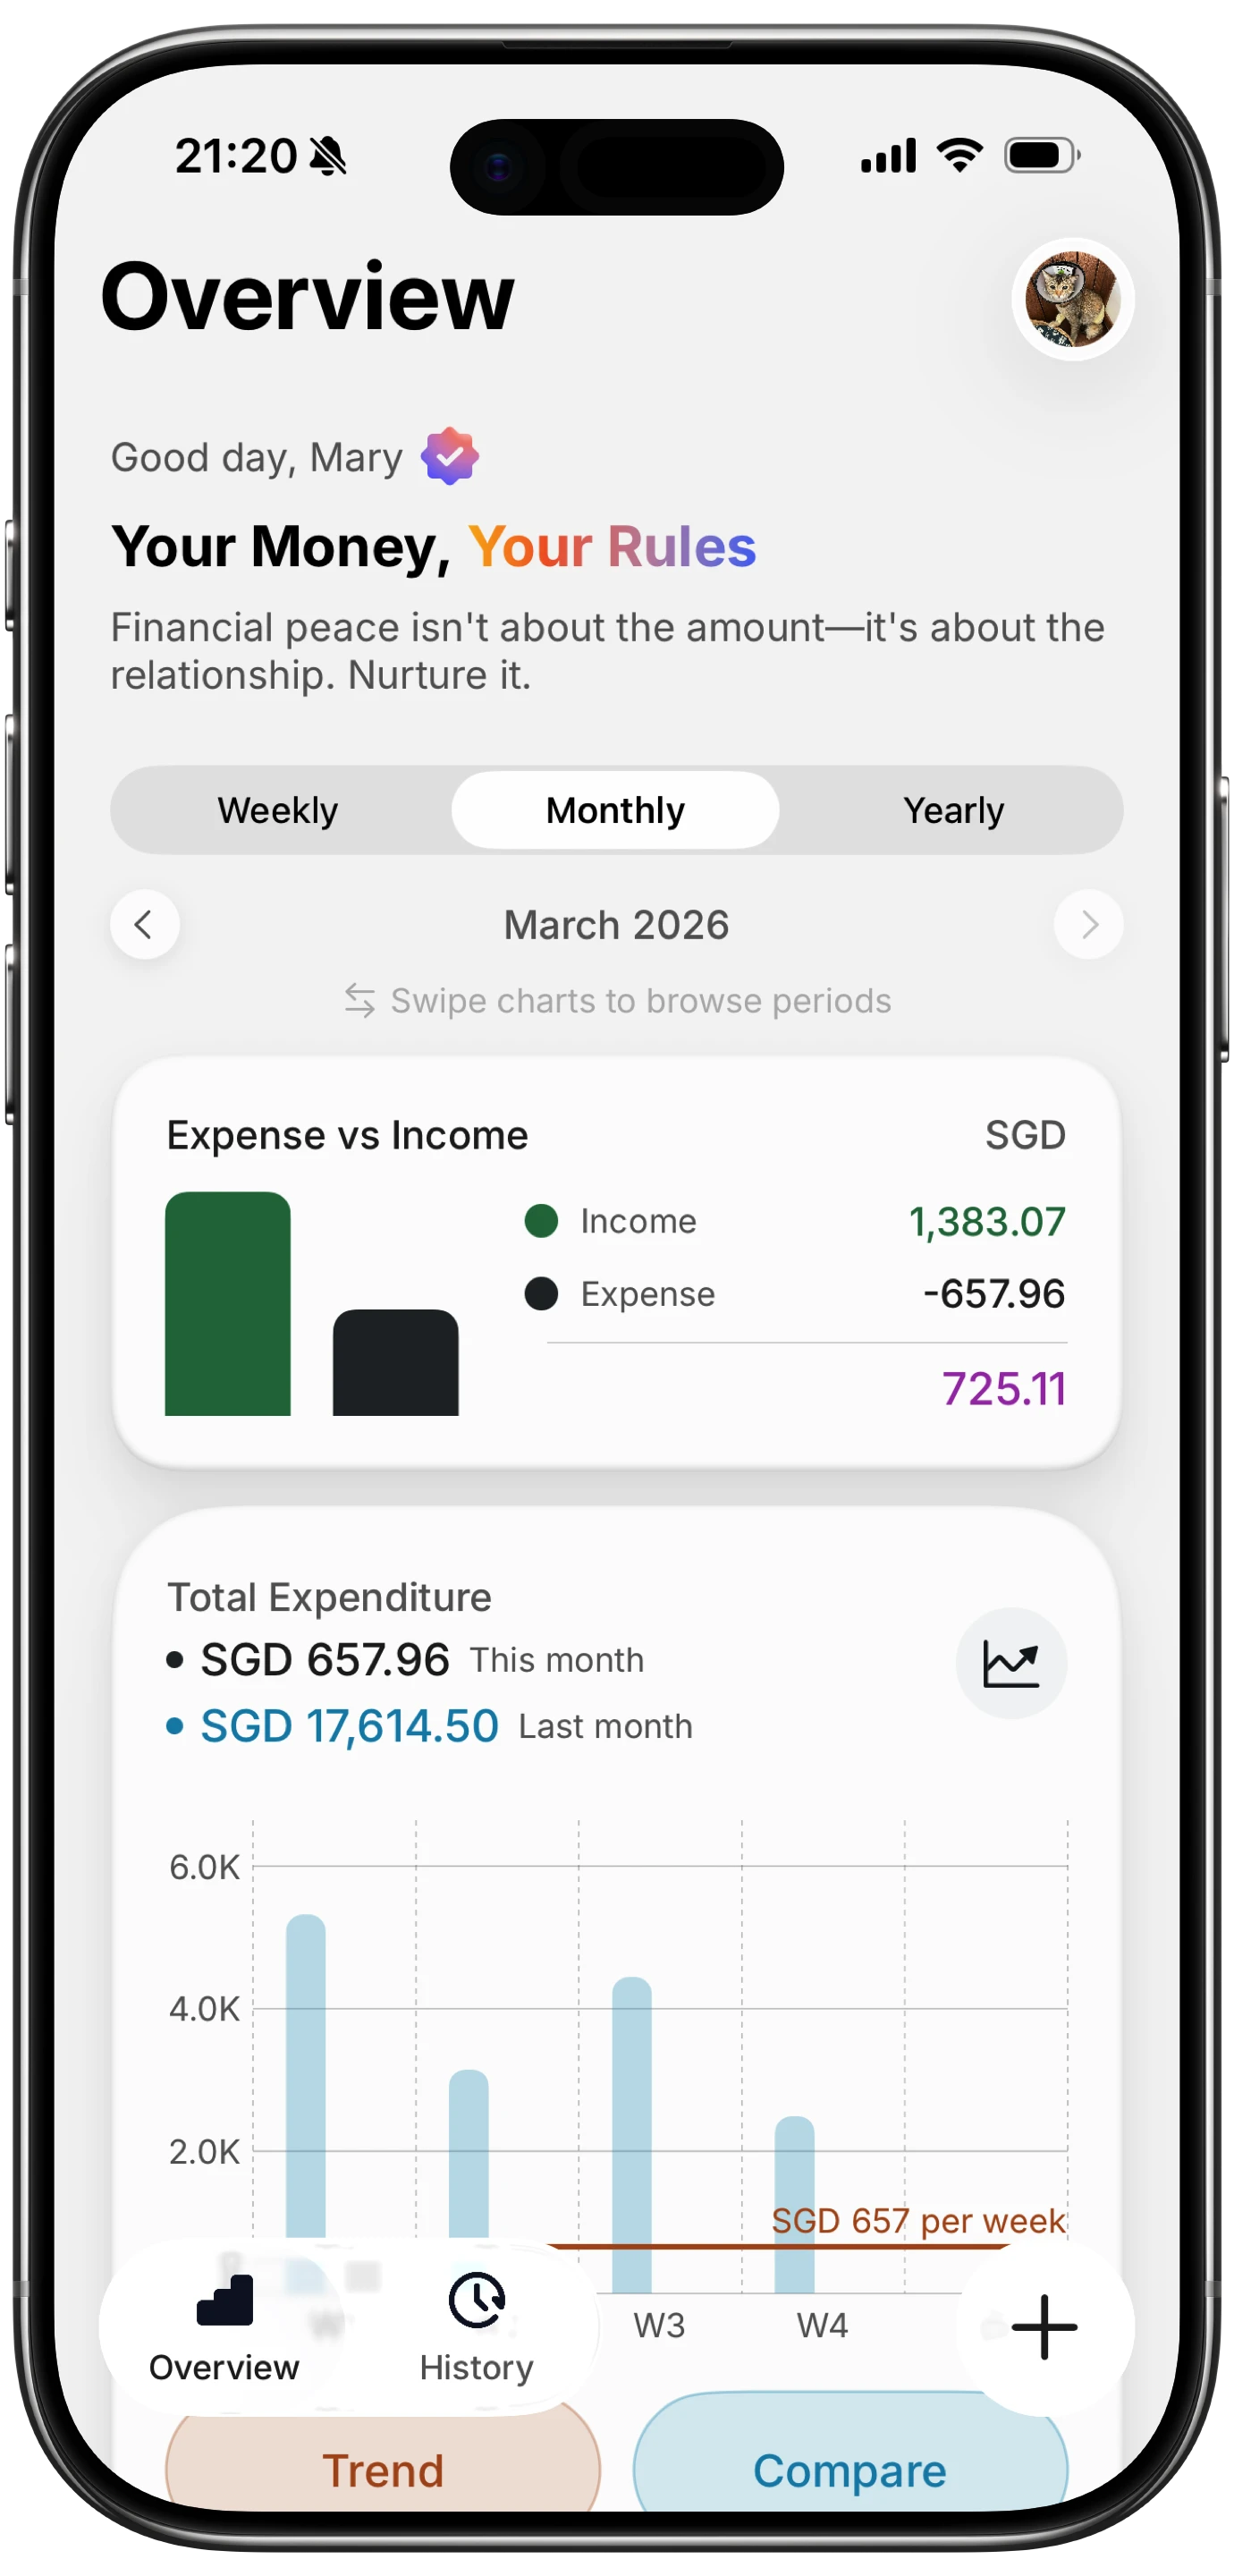
Step 4: Track income in the same app as expenses
Most systems fail on the income side because invoicing lives elsewhere (Stripe, PayPal, Google Doc template). This makes quarterly tax estimates painful.
Log every client payment the day it arrives:
- When a deposit hits your bank, create an Income entry.
- Tag it with the client name and invoice reference.
- Attach a screenshot of the payment confirmation.
- Check income totals against your invoicing tool monthly.
Having income and expenses in one ledger means your profit number is visible every time you open the app. You will hesitate before a frivolous subscription when the month's profit is staring at you.
Step 5: Use mileage tracking for driving expenses
Mileage is a deduction most freelancers miss. The 2026 standard mileage rate is 72.5 cents per mile, so 200 business miles per month is $1,740 in annual deductions.
Two approaches work on iPhone:
- Manual entry: log odometer readings, date, and purpose after each trip. Works if you drive rarely.
- Automatic detection: some apps use the iPhone's motion sensors to detect drives and ask you to classify each one. Battery impact is minimal.
Note the business purpose for every trip. The IRS wants intent, not just distance. A note like "meeting with acme corp about Q2 contract" is sufficient.
Step 6: Export quarterly for tax estimates
Self-employed people pay estimated taxes four times a year: April 15, June 15, September 15, and January 15. Missing these triggers underpayment penalties.
Every quarter:
- Export transactions for the quarter as CSV or PDF.
- Open the export in Numbers or Google Sheets.
- Sum income, sum expenses, calculate profit.
- Multiply profit by your expected tax rate (15.3% self-employment tax plus your federal and state bracket).
- Pay via IRS Direct Pay or your state portal.
A rough estimate for most freelancers is 25% to 30% of profit, but your CPA will give a tailored number.
Step 7: Back up to iCloud and review monthly
The least glamorous and most important step. A tracking system without backup and review is a liability.
- Backup: enable iCloud backup under Settings. If your app supports iCloud sync or export to Files, enable it. Export a CSV monthly to Drive labeled by year.
- Monthly review: block 30 minutes on the first of each month. Look for miscategorized items, duplicate receipts, and missing income entries. Reconcile against bank statements.
If the review takes more than 30 minutes, your system has friction you need to remove.
Free business expense tracking spreadsheet template
If you are under five transactions per week, here is the minimum viable structure. Create a Google Sheet with these columns on the "Transactions" tab:
| Column | Data type | Example |
|---|---|---|
| Date | Date | 2026-04-15 |
| Type | Income / Expense | Expense |
| Category | Dropdown (Schedule C) | Software |
| Amount | Currency | 29.00 |
| Merchant / Client | Text | Notion |
| Notes | Text | Team plan |
| Receipt link | URL | Drive link |
| Business purpose | Text | Project management |
On a second "Summary" tab, build a pivot table that groups by Category and shows totals per month. Add a third tab called "Mileage" with Date, Start, End, Miles, and Purpose. Apply a SUMIF formula at 72.5 cents per mile.
Save receipts to a Drive folder by year and paste the shareable link in the Receipt column. This template runs free forever, but will creak above 20 transactions per week.
When to upgrade from spreadsheet to app
Upgrade when any of these become true:
- More than five transactions per week and you are falling behind.
- You bill multiple clients and need per-client profit reports.
- You drive more than 100 business miles per month.
- You travel internationally and need multi-currency tracking.
- Receipt volume makes your Drive folder unmanageable.
- You want one-tap logging via Shortcuts or NFC.
The big names for self-employed iPhone tracking in 2026:
QuickBooks Solopreneur
About $20/month, Intuit's simplified product for Schedule C filers. Strong TurboTax integration, bank auto-import, mileage tracking. Requires sharing bank credentials.
Wave
Free for core accounting and invoicing. You only pay for payment processing. Good for low-volume freelancers who invoice more than they spend.
FreshBooks
Starts at $21/month Lite. Built for service freelancers who invoice regularly. Clean interface, good time tracking.
Finny
iPhone-first at $1.99/month Pro. Receipt scanning, Apple Shortcuts for Tap to Track, no bank connection required, offline capture. No invoicing, so pair with Wave if you bill clients. Best for freelancers who want low-friction capture without sharing bank credentials. See our roundup of expense trackers with no bank login.
Once you have a capture habit in place, three companion guides take this further: the self-employed expense tracker for iPhone 2026 guide maps apps to Schedule C categories, the 1099 tax calculator guide turns those tracked totals into an actual tax estimate, and the free business expense tracker apps for freelancers 2026 roundup is worth bookmarking if cost is the main filter.
Frequently Asked Questions
What app do I use to keep track of business expenses?
The right app depends on volume. QuickBooks Solopreneur suits freelancers who want TurboTax integration and bank auto-import. Wave fits those who invoice heavily and want a free option. FreshBooks fits service professionals tracking time per client. Finny fits iPhone-first freelancers who want fast receipt capture and Shortcuts automation without bank connections. Start with the cheapest option that matches your volume and upgrade when you outgrow it.
What is the best spreadsheet template for self-employed expense tracking?
The simplest template has three tabs: Transactions (Date, Type, Category, Amount, Merchant, Notes, Receipt link, Business purpose), Summary (pivot by category and month), and Mileage (Date, Start, End, Miles, Purpose). Build category dropdowns that match Schedule C line items so year-end filing is a copy-paste job. Google Sheets is fine for most freelancers because it syncs to iPhone via the Sheets app.
How do I separate business and personal expenses on iPhone?
Open a dedicated business checking account and credit card. Route every business transaction through those accounts so your personal statements stay clean. Tag each entry as Business or Personal in your app. For mixed-use items like a phone bill, allocate a business percentage (often 50% to 70% for full-time freelancers).
Do I need receipts for every business expense?
The IRS generally requires documentation for expenses over $75, and always for lodging. Keep receipts for everything. Digital copies are acceptable. The iPhone Camera or Notes scanner plus a cloud folder satisfies IRS recordkeeping rules. Keep records for at least three years after filing.
Can I track business expenses without linking my bank account?
Yes. Manual entry plus receipt capture is a valid system, often preferred by freelancers with privacy concerns. Apps that support Apple Shortcuts, NFC tags, and share-extension receipt capture make manual tracking fast enough to compete with bank auto-import. The tradeoff is monthly reconciliation against bank statements.
Ready to stop dreading tax season?
Download Finny to log business expenses and income from your iPhone in seconds. Receipt scan, Apple Shortcuts, NFC tagging, offline capture, and no bank login required. $1.99/month for Pro.


